
Aquarium Water Change Mixing Station
- Brian Blake
- Apr 2
- 6 min read

Whether you're adding minerals back into RODI water for a freshwater water change, or mixing salt for a reef tank, mixing new water can be a time consuming and messy experience if you don’t have the right tools and equipment. With a small investment, and a little bit of easy plumbing, I can show you how to streamline your water change procedure and make water changes a breeze.
Mixing individual 5 gallon buckets is a nightmare. Even mixing all your water at once in a brute trash can is inefficient. I've been installing water change mixing stations in homes and businesses for years and I’ve settled on a setup I like quite a bit.
Now there is always room for improvement; and every system is a little different, but the idea behind the aquarium water change mixing station is pretty simple. In this article I’m going to cover the materials you’ll need, the plumbing you’ll install, where to set up your mixing station, and why this system is, in my opinion, better than carrying buckets.
Materials for Your Aquarium Water Change Mixing Station
The mixing stations list of materials are as follows.
Norwesco vertical liquid storage tank (sized to your needs)
AC external pump
Magnetic powerhead
Inkbird or similar two-plug heater controller
Titanium heating element
Barbed ball valve
Uniseal bulkhead
Vinyl tubing
PVC 90 degree street elbow (2)
PVC Schedule 80 true union ball valve (3)
PVC Tee fitting
PVC female adapter (2)
PVC 90 degree elbow (2)
PVC reducer bushing
PVC Male Adapter threaded
Adjustable float valve
Norwesco Vertical Liquid Storage Tank

The container in which you store your new water for water changes must be sealed to prevent gas exchange which leads to drops in alkalinity in saltwater, and the introduction of organics, which can cause unwanted growth of bacteria and other microorganisms in the tank. It must also be made of a material that can hold saltwater or heavy mineralized freshwater without degrading. The container also needs access from the top via a sealable lid, and preferably a pre-drilled hole with a threaded bulkhead at the bottom for plumbing.
The Norwesco vertical liquid storage tanks meet all of these criteria. They come in multiple volumes and dimensions. For example, you can get a 100 gallon tank that measures 28 inches in diameter and 43 inches in height, or a 105 gallon tank that measures 23 inches in diameter and 63 inches in height. There are several options for most volumes to fit your space. Volumes range from 10 to 15,000 gallons.
Once you’ve chosen your storage vat size, take note of the threaded bulkhead size that comes pre-installed with the vat. This will help determine the size of your plumbing and AC pump. I recommend 1 inch pipe, fittings, tubing, and inlet/outlet on the pump. This size ensures a fast and efficient flow of water. ¾ inch plumbing will also work if 1 inch is too large for a smaller system.
AC External Pump
The AC pump is responsible for moving the water from the vat to the aquarium. It can also be used to mix the water within the vat, in addition to the powerhead. The size of the AC pump is determined by how far and how high the water must travel to the aquarium, and the size of plumbing you want to use.
If your vat is right next to the aquarium, a pump with around 750 to 1000 gallons per hour (GPH) and a head height of 10 to 15 feet is more than sufficient. If your vat is in the basement, and your running hose or pipe to the floor above, you’ll need a head height of about 45 feet and a GPH closer to 2000.
The size of plumbing you’ll be using (1” or ¾”) will also determine the size of the outlet of the AC external pump. You do not want water moving through a 1 inch pump outlet, just to be constricted to ¾ inches by the plumbing. Match your pump inlet/outlet size to the plumbing size you’ll be using.
Heating & Circulation
Within the vat, you’ll attach a magnetic powerhead of between 600 and 1200 GPH depending on the diameter and volume of the vat, and what type of water you are mixing. For example, a 23 inch diameter vat at 105 gallons, mixing freshwater, needs a 700 GPH circulation powerhead. However, a 28 inch diameter vat at 120, gallons mixing saltwater, needs a 1200 GPH circulation powerhead.
Heater
For vats over 100 gallons I recommend a 600 watt titanium heater. For vats under 100 gallons, you can use 400 watts. Vats under 40 gallons can use 200 watts. The heating element should be overpowered to ensure quick heating of the water.
Control of Heating and Circulation
To control the heating and circulation I recommend a heater controller with two regular outlets. Plug the heater into one outlet and the powerhead into the other. When the heater is on, so is the powerhead. If you need to mix the water without heating it, or mix it more quickly, after you just added salt or minerals, you can use the AC external pump.
Some Norwesco vats come with a twist opening at the top of the lid which allows you to suspend the heater, the probes, and the powerhead cord. Other vats need a hole cut into the top so you can feed the cords through, then seal the hole with silicone. For saltwater mixing stations, it is vital there be no gaps for air to transfer as that will leach CO2 into the water and lower your alkalinity over time.
The heater and probes can be suspended from the top. Make sure the heating element does not touch the bottom of the vat. The powerhead can be attached via the magnet to the outside of the vat, just like you would install it in a normal aquarium.
Plumbing
The plumbing for the mixing stations is designed to both allow the pump to circulate water from the bottom of the vat to the top to allow fast mixing, and to move water from the vat to the destination via hard or soft plumbing.
Order of plumbing parts (from bottom)
PVC threaded x socket male adapter
PVC reducer bushing
PVC 90 degree elbow (street)
Pipe
PVC schedule 80 true union ball valve
Pipe
PVC 90 degree elbow (street)
PVC female adapter
AC external pump
PVC female adapter
Pipe
PVC Tee fitting
PVC schedule 80 true union ball valve
Barbed x threaded fitting (if using soft tubing)
Pipe
PVC 90 degree elbow (street)
PVC schedule 90 true union ball valve
PVC 90 degree elbow street
Uniseal bulkhead
(optional)


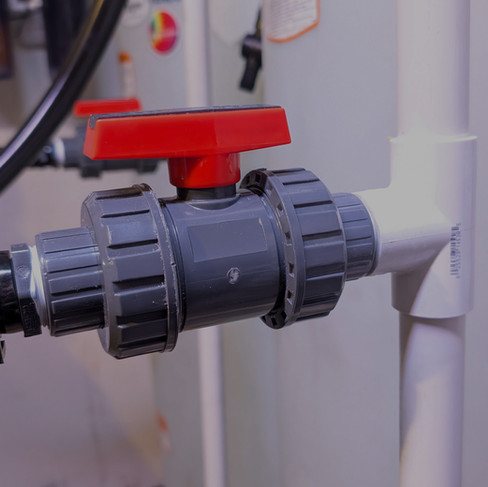


Following the photos, the order of plumbing listed above is from the bottom bulkhead to the top of the vat. the reducer bushing should be sufficient to reduce the pipe size from the diameter of the bulkhead in the vat to the diameter of the pump you'll be using. For example, a two inch bulkhead reduced to one inch pipe needs a two inch to one inch reducer busing.
Choosing a Location for Your Mixing Station
The aquarium water change mixing station can be located anywhere in your home or office. Ideally, it would be close enough to the sump or display tank, depending on which one you pull water from for water changes, to minimize the amount of pipe required to reach it. The station is fed via the RODI system and its tubing which is much easier to run over long distances. Therefore, the vat does not have to be placed directly next to the RODI system.
The location you choose for the mixing station will determine the size of pump you install. If your sump and RODI system are in the basement and the display is upstairs, then the pump only needs to run around 900 GPH to reach the sump a few feet away.
If your display and sump are upstairs, but the RODI is downstairs, you can decide to install the vat downstairs with a 40 foot head height pump and plumb the vat (soft or hard plumbing) upstairs to the display, or install the mixing station upstairs near the display and plumb the RODI tubing from downstairs.
You can even install the mixing station in a nearby room; it doesn't have to be next to the display. It comes down to whether you want the mixing station hidden or not and how much plumbing you feel comfortable installing.
Purpose
The aquarium water change mixing station solves several problems. It makes water changes more convenient, cleaner, safer, and more efficient.
Adding salt once a month and performing several water changes from one batch saves time. The aquarium water change mixing station’s plumbing greatly reduces the chance of spills. Injuring yourself carrying buckets upstairs or pushing trash cans full of water across the living room is no longer a concern with this setup. Perhaps, most importantly, water changes can now take a matter of minutes instead of hours.
When water changes are easy to perform, we actually do them more often. Which directly translates to a healthier and cleaner aquarium.
Get started on your plans for a mixing station today. You can always contact us at Boodleshire Aquatics if you want any help.
Comments